Index
Features of the Corsair Saber RGB Pro

| Trust Graphin | |
|---|---|
| Type | Gaming mouse |
| Sensor | PMW3392 |
| DPI | 18,000 |
| Polling rate | 8000 Hz |
| Programmable buttons | 6 |
| Link | Usb |
| Cable | 1.8 meter “Paracord” |
| Internal memory | And |
| Rgb | And |
| Software | iCUE |
| Cut | 129 mm wide 70mm Ancho 43 mm viola |
| Weight | 74 grams |
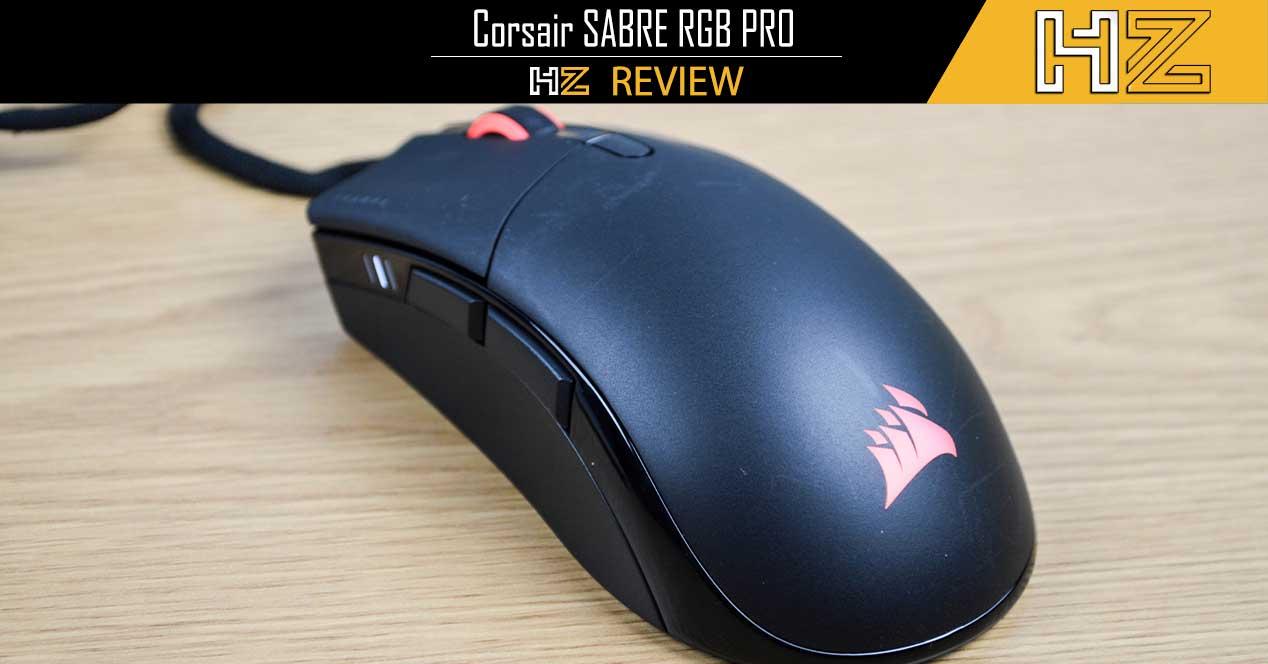
The Corsair Saber RGB Pro mouse belongs to the Corsair Champion Series. This means that we are dealing with a very high quality device, designed and tested by esports professionals and which, therefore, meets the grip, comfort and response requirements of these players.
This mouse has a 18,000 DPI PixArt PMW3392 optical sensor. This sensor has 450 IPS tracking and achieves acceleration up to 50G. The precision is customizable, allowing values to be assigned with an accuracy of 1 DPI, with a minimum of 100 DPI. The mouse has a 8000 Hz polling frequency (Hyper-Polling), getting virtually instant responses.
This model has approx OMROM push buttons that give us a lifespan of up to 50 million clicks. These buttons use Corsair’s QuickStrike technology, which places the button next to the push button so there is no gap and keystrokes are as quick as possible. In total, the mouse has 6 buttons (customizable, thanks to iCUE) including the DPI change button.
This mouse has three areas of RGB lighting. The first of these will be on the palm, in the form of the Corsair logo, the second on the mouse wheel, and the third on its own DPI indicator.
The mouse is connected to the computer using a USB cable. is “Paracord” cable It uses a new Corsair design which makes it very flexible and light, so we can use the mouse without even realizing the cable is there. The cable has a braided finish and measures 2.1 meters.
The dimensions of this mouse are 129mm long, 70mm wide and 43mm high. In addition, it is one of the lightest mice on the market at just 74 grams of weight.
Corsair Saber RGB Pro external review
This new mouse comes in a cardboard box, identical to that of the company’s other peripherals. In the box black and yellow colors predominate, and on the front we can see a photo of it, while on the back we will have the technical specifications of the mouse.


Once the box is opened, we will find the manual, the safe use guide and the warranty guide.

The mouse is properly protected in a cardboard blister and a plastic cover so that it does not suffer any damage during transport. The design of the mouse, as we said, is very simple, with nothing that stands out particularly. Its color is black and the construction material is plastic.

In the palm we will find the Corsair logo, which will light up when connected to the PC.

At the front we will find the click buttons and the mouse wheel. This wheel also features customizable RGB lighting. We will also find the DPI toggle button here.

The sides are also very simple. On the left side we will find the buttons for moving forward and backward, as well as the profile and the DPI indicator, while on the right we will not find anything.


At the bottom of the mouse, we can see a sticker with the technical specifications of the sensor, as well as the non-slip feet for better handling.

The cable exits from the front of the mouse. It’s long enough to connect it to any PC within 2.1 meters, and it’s very flexible, so we won’t have any kind of problem or ballast.


Test and performance
In order to get the most out of this new Corsair mouse, it is recommended to install the iCUE software. We can download this program from the manufacturer’s website, and it will allow us to configure the performance of the mouse, DPI, and even RGB lighting.
iCUE
iCUE is the program that Corsair offers us to configure and control its peripherals. Already updated to version 4 of this software, let’s see what we can do with it. As soon as you connect the mouse to the computer, iCUE detects and recognizes it. If not, we don’t have the latest version installed on the PC.

From the peripherals panel, we will be able to change the profile of the mouse among all those that we have configured. We will also be able to configure some of the quick and automatic lighting effects that the software offers us.

Once inside the options, the first thing we will find will be a photo of the mouse in question with all the configuration options it offers us.

The first, “Key Assignments”, allows us to remap each of the mouse keys. We can choose the button we want and assign it to the behavior we want.

The next section is “Lighting Effects”. From there we will be able to configure all the mouse lighting elements.

In “Hardware lighting”, we will be able to choose the lighting that we want the mouse to have at the hardware level, ie when iCUE is not working.

The DPI section is responsible for allowing us to configure the sensitivity of the mouse sensor. From there we can create multiple profiles, and each of them will have its corresponding 5 sensitivity phases, as well as another when we activate the “Snipper” button (although this mouse does not have a button for this we can assign to any other of the same).


In “Surface calibration” we can calibrate the sensor to work according to the sensitivity of our mat.

And finally, the “Surface calibration” section allows us to access more advanced mouse settings. For example, we can check for new firmware versions, adjust polling rate, or configure brightness.

From there we can activate the 8000Hz polling rate. Or, if we prefer (to relieve the CPU load), we can choose any other jump, like 125Hz, 250Hz, 500Hz, 1000Hz, 2000Hz, or 4000Hz.

Performance Test
Once we’ve seen all of the configuration options iCUE gives us to customize how this mouse works, now we’re really going to take a look at how its sensor works and its 8000Hz polling rate. To do this, as always, we are going to use two different sensors. The first of them will be Enotus Mouse Tester.
It is one of the most accurate programs when it comes to easily measuring different aspects of your sensor. In this way, we will be able to find out what is the real resolution of the sensor and what are the values offered by its accuracy. That way we will know if it is compliant or may not be as accurate as promised.

As we can see, the values that this program has captured are excellent. We obtained the expected resolution when measuring it in the tests, as well as good precision and fineness. Regarding the speed of the mouse, we obtained excellent precision, even if we are a little far from the 8000 Hz that the manufacturer promises us. The tests were performed on a 10th generation Intel Core i3. Certainly, with more powerful hardware, we would come much closer to these 8000 Hz.
And second, we’re going to use the other program we usually analyze mice with: Mouse Tester. This software takes care of capturing all the values of the mouse sensor when we move it randomly on a surface. Once the data is captured, the software allows us to visualize it in a graph so that we can get a feel for the accuracy of the sensor over time.
We performed three different tests. The first is at 100 DPI, the second at an average of 2200 DPI, and the third at full resolution. All, of course, with the voting rate at its highest value.
As can be seen, the results obtained in the three tests are very similar. Excellent results with a balanced variance worthy of a high-end mouse worthy of professional gamers.
Conclusion of the Corsair Saber RGB Pro
Of course, this mouse was created by and for professional gamers. Instead of aesthetically creating a revolutionary mouse, Corsair preferred to bet on a basic and simple design, without frills, hiding all its potential inside. So, we have a symmetrical design, for right-handed people, where only the buttons on the side, for the thumb, and the DPI indicator, also on the side, stand out. In addition, the RGB lighting on this mouse is very discreet, limited only to the wheel and the Corsair logo on the palm.

Another of the things that we liked the most was the cable. This, generally, is usually the biggest obstacle when reading, as surely more than once it has bothered us or given us a strange attraction. This Corsair cable is very light and flexible. We won’t notice he’s there.
In general, there is no negative point that stands out in this mouse. Corsair has taken care of every detail. What we missed, for example, is a Snipper button to reduce DPI on the fly, along with other details. If we are users accustomed to mice with many buttons and many features, it surely seems too simple to us. Although we should still try.
For all this we decided to give the mouse Corsair Saber RGB Pro our reward of oro.

Table of Contents