Overloading the GPU is not as complicated as the CPU, but depending on the GPU series, it involves some risks that can damage the card itself. Since the installation of GDDR5X, it is very difficult for the GPU to fail, because it has protection and debugging and both NVIDIA and AMD have changed memory controllers to host ECC.
However, this represents a small number of models and chips compared to the bulk of the industry just from 5 or 6 years ago, so we have to pay attention to the fact that there are allegations that prices are inappropriate and that this will depend on each card mentioned.
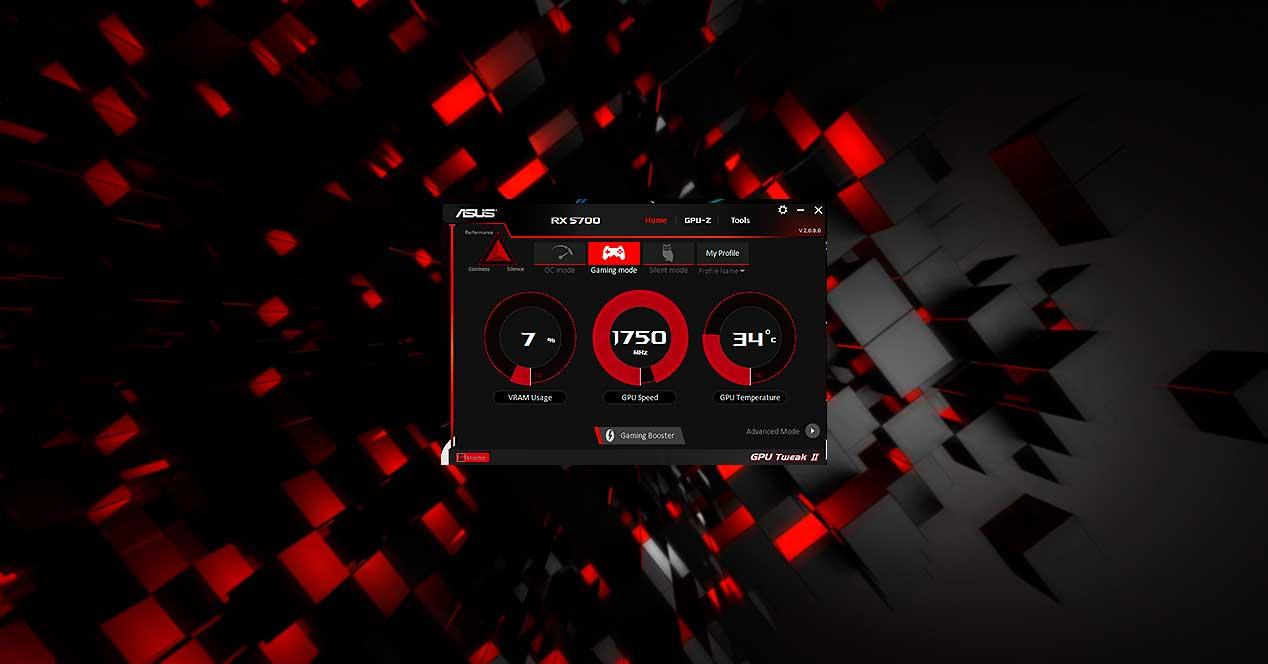
ASUS GPU Tweak II: a simple and effective tool for making excess

We will assume that this program has already been installed and that we are familiar with the various subjects that we have been seeing and commenting on. Therefore, we will go straight to knowing the values we should affect our GPU.
First, we will use the specific option that in certain manufacturer models ASUS can give us some benefit when it becomes excessive. To do this we will go to the program settings and when inside we will use the "Overclocking range upgrade" dialog box. We may ask for a fresh start when submitting it, in which case we will accept an invitation to do so.
In the event that we do not have to restart and reboot, we will enter the upgraded mode directly, because here we will have different rates of overuse. These categories are:
- GPU Clock (MHz): the speed at which our GPU will travel. Higher value means higher performance and is the key parameter that we must optimize to achieve high FPS.
- GPU Voltage (mV): higher speed means higher power. This value should be set to the maximum allowed number of software provided that no two cases are possible.
- GPU has BIOS turned on.
- The temperature of the Stock GPU does not exceed 85 degrees.
- Memory Clock (MHz): graphics card memory speed. Higher value means higher speed and therefore more performance with FPS in games. It is less represented than the CPU Clock value in terms of MHz per FPS.
- Fan Speed (%): The speed of GPU fans. We can choose to leave it in the car or force an aggressive curve if we want to keep temperatures low. This is important because at low temperatures we measure many MHz and consequently more efficiency or robustness.
- Power Target (%): Also referred to as PT, it is a benefit to reduce energy. 100% of which is the use of card stock and depending on the model can go up or down. In any case, and to avoid limiting it, we will increase it to its maximum power because it has no direct effect on the frequency or frequency that exceeds the percentage reduction. Low value reduces frequency, electrical power and therefore consumption also logically reduces temperature.
These 5 are related, of course, so some will affect others and a series of priorities should be established.
How to overuse the GPU with ASUS GPU Tweak II

The first thing we have to consider is the breathing line, that is, with our GPU for normal use while playing, what temperature we have on average. This will logically vary between winter and summer, so temperatures will change and the GPU will suffer.
These details must be considered, because in winter we can strengthen the frequency much less than in summer. We assume that our GPU does not exceed 85 degrees of gaming stock, otherwise the temperature is at the home model level, anything lower allows for a margin (greater or less depending on the case) of duplication.
Low stock temperatures leave more margins, lower temperatures leave smaller margins to climb. In any case, the process is the same:
- We will recommend PT at its highest price. Usually this is usually 20% or 30% over 100%, which shows that if our hypothetical GPU uses 100 watts at 100% PT, it can now consume up to 100 watts. -120 or 120 watts at 120% and 130% respectively. This is a simple rule of three and applies to all GPUs.
- We will raise the voltage at its highest if we pay attention to the considerations of the previous section. Each build will have a maximum power limited by the BIOS, so you can't assign a standard value here, we just move the slider high, so that it doesn't scale. This can be corrected later when it exceeds the full temperature.
- If we want the largest overuls, we will have to set the fan to 100% correct, which means it sounds great. On the other hand, if we want to look at standard 24/7 overuls, we can customize the curve by clicking on the Define user button, or we can leave it out of stock and BIOS is the RPM control depending on the GPU temperature.
- With this clear and standardized claim it is time to start expanding the GPU's MHz. This is important, because many people start with VRAM, which is a false idea. The GPU puts VRAM drivers inside the chip itself, so if its frequency and power are not well controlled, it doesn't matter what VRAM manages to mount, it won't be stable due to the GPU.
- We'll start with the increase of +50 MHz on the industry's most popular GPUs (it's good to know the speed of our model compared to the speeds of original AMD specification and NVIDIA of the same chip). This is done so as not to force a screenshot or hang on users who already have the best models in the series. The rest can start at +100 MHz easily.
- Once the value has been set and used, we will have to go for the most demanding test or bench. We do not recommend using Furmark or the like, because they emphasize more than GPU electrical possibilities, that is, they want a whole card more than what a game or benchmark is and moreover they don't use the latest technology. Our recommendation is to use some 3DMark tests, such as Time SPY, DLSS, PCIe bandwidth or VRMark. Each one will deliver what is needed within a specific field without exceeding the limits, ensuring maximum strength and stability.
- If you pass all the tests we can load some 25-50 MHz (depending on the GPU model). If you fail the tests, the operation is repeated, until it fails, hangs or pops up on the screen, or the PC restarts. At that point we will go down and test next 13 MHz on the NVIDIA GPUs and 10 MHz on the AMD GPUs and start again with the tests. If the GPU is still single, we will lower the same figures and more until they stabilize and the temperature does not exceed 85 degrees, the most important factor for the integrity of the entire PCB.
- Once we have a higher GPU value, we have to do the same with the VRAM value, but in this case we will move from 100 MHz to 100 MHz, ALWAYS, we emphasize, with the GPU value at its highest value. This will take a little time, as most of them increase between 500 and 700 MHz on average.
- Only one thing to keep in mind: if we have a GDDR5 or a drop in our GPU, excessive movement can leave the card as paperback. On the other hand, if we have GDDR5X or higher, many MHz may not provide high performance because ECC is active. The test scores are the same 3DMark Time Spy They will be important to know where the limit is, and when they go up, everything is fine, as soon as we lose points, we have to reduce the MHz to VRAM.
- Once we have the maximum value, we can only pass tests like "Stress tests" for 3DMark. This will give us an idea of how the card behaves with full overbacks and, above all, how many percent of its durability it has. The best is 98%, which shows the highest durability, but not all get it. In such a case we would have to limit overuls to GPU or VRAM or both, we would have to try.
- After many such experiments, there is nothing like playing, looking at things that cannot be done and should be done while testing the waves and their wake, especially because they are not equal or controlled by circumstances, and therefore, we would not know if it was a problem in the play field or the overuls problem. Any game we play and need will suffice for a real acid test, where if it fails again, we'll have to fix the overuls and look down.
- This is helpful because a very large number of engines, APIs and outputs will really test the GPU, but once we've hit the key, that overload can only be burned by a very high temperature, logically affecting the graphics card. .
We secured more advanced strategies, such as NVIDIA frequency curves or played with different AMD BOOSTs. This would be one more step we will see in the next lesson of throwing our graphics card up to date.